Occasionally, when connecting an external device to your computer, it may go unrecognized, accompanied by a USB device not recognized error. This issue often stems from the USB port itself or the enabled USB Selective Suspend option on your device. In this article, we’ll show you how to disable USB selective suspend settings in Windows 11 and get rid of this issue.
How to Disable USB Selective Suspend Settings in Windows 11
USB Selective Suspend is a helpful feature as it reduces power consumption when external devices are idle. It is a very useful feature, but it can be quite troubling if you don’t know when and where to use it. By default, the feature is enabled on our system. So, if you want to turn this feature off, here are the steps to do so:
1. Go to the Search tab from the taskbar and search Control Panel and Open it.
2. Click on the System and Security option.
3. Click on the Power Options option.
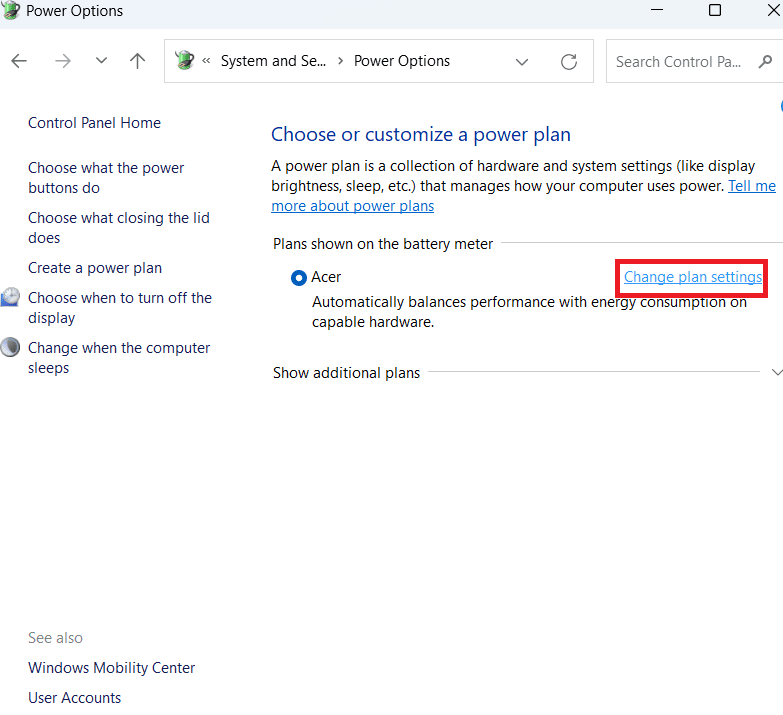
4. Click on the Change plan settings option next to your currently applicable power plan.
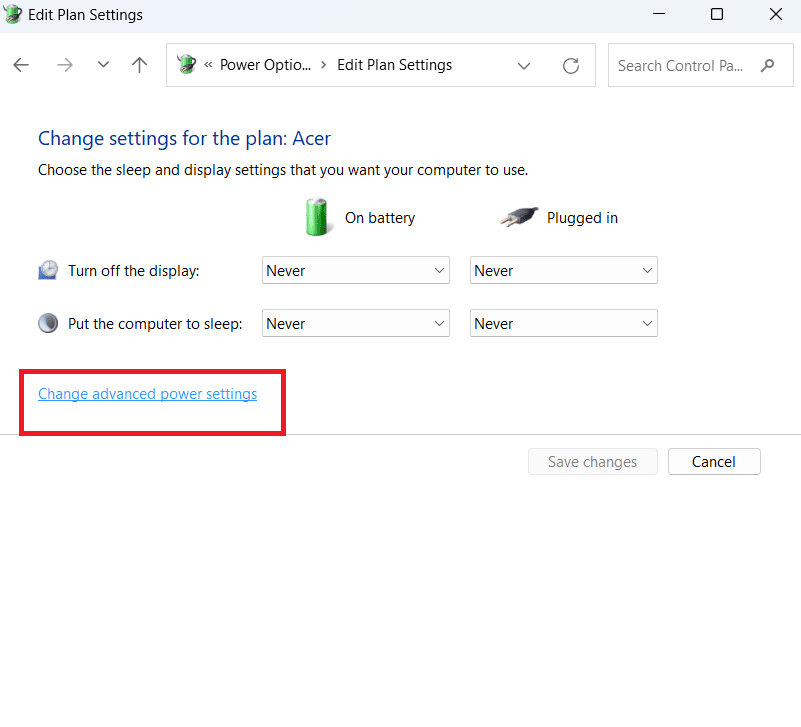
5. Click on the Change advanced power settings option.
6. On the pop-up window, scroll down and double-click on the USB settings option. Double-click on the USB selective suspend setting.
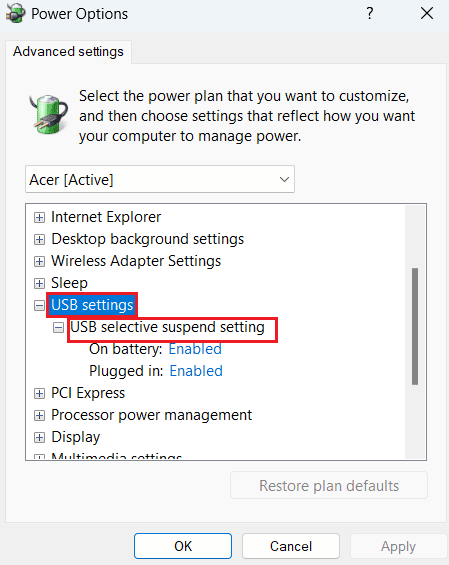
7. Click on the On battery option, and from the drop-down menu, select Disabled. Do the same for the Plugged in option. Finally, Click Apply after doing the necessary changes and then click on OK.
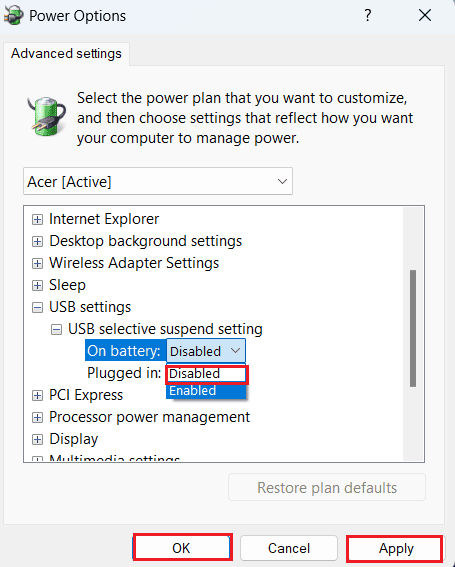
Now the USB selective suspend settings are disabled on your device. The issues you faced earlier might get solved. If they persist, then there’s some other issue you need to look out for.
We hope this article guide was helpful to you and you were able to figure out how to disable USB Selective Suspend settings in Windows 11. If you have any queries or suggestions for us, please let us know in the comment section.
